Strategic Shoveling for Avalanche Rescue
The average burial depth in an avalanche is around 1.3 meters, which equates to about 1-1.5 tons of snow to move in order to extricate someone from avalanche debris. That’s just on average, in reality, someone could be buried much deeper. How long can someone survive under the snow? On average, if you get someone out in the first 15 minutes, they have a 92% chance of survival as long as they are not dealing with any major trauma. After that… the numbers are bleak. Survival rates drop to 37% after 35 minutes.
Over the years, From 1977-2000, the mean rescue time for recreationists (this includes beacon search) was 29 minutes. From 2000-2006, with the increase in avalanche education and more refined strategic shoveling techniques, the mean rescue time for recreationists decreased to 18 minutes. Research shows that the best way to decrease rescue times and overall mortality rates is to decrease the time spent in the shoveling phase, so let’s get into it.

Strategic Shoveling Techniques
Be Proactive
I would be remiss to not remind you all that the best way to survive an avalanche is to be proactive and not get caught in one to begin with. Take an Avalanche Course and get the education to avoid needing your shovel for anything but training weight. Then, since this post is geared towards just the shoveling aspect of a rescue, make sure that you understand Single Burial Avalanche Rescue techniques and how to use your Avalanche Beacon and probe to pinpoint a buried person’s location.
Shoveling 101: The ABCs
Once you’ve pinpointed a buried individual with a probe strike, the ABC’s tell you where to start digging.
Airway: Start digging downhill of the probe strike (and avoid standing on or above the probe) to preserve the airway of the buried individual.
Burial Depth: The burial depth tells you how far downhill you need to be before digging in towards the probe. The general rule is 1.5x the burial depth found on your probe, but moving one step downhill for a 1 meter or less burial and 2 steps downhill for anything greater than 2 meters is easier to remember and just as effective.
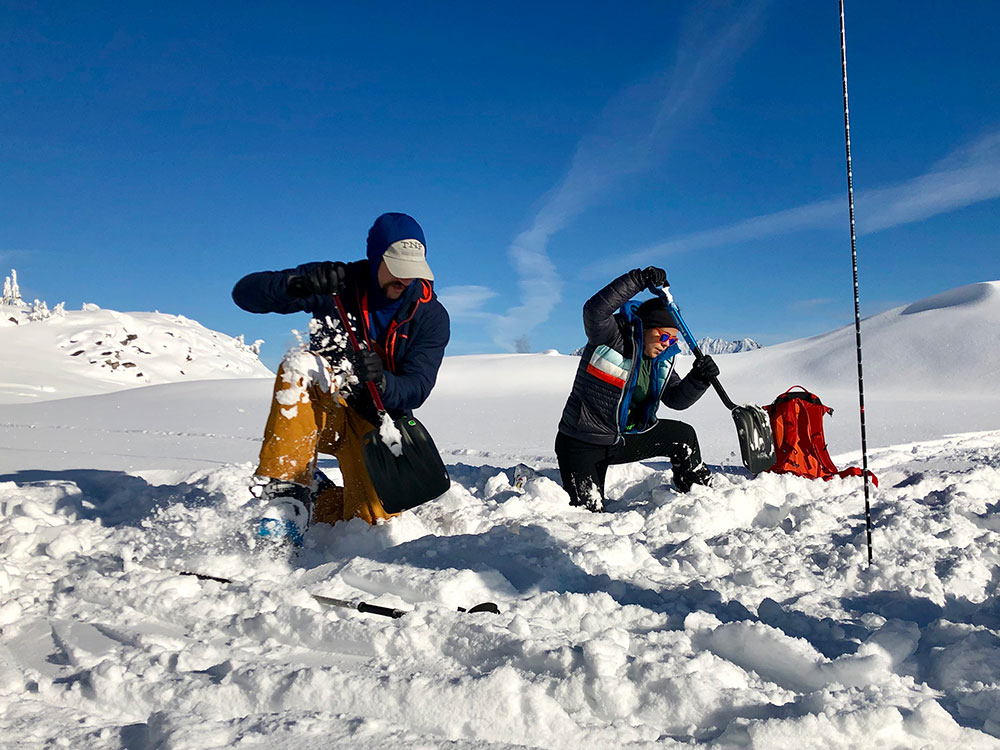
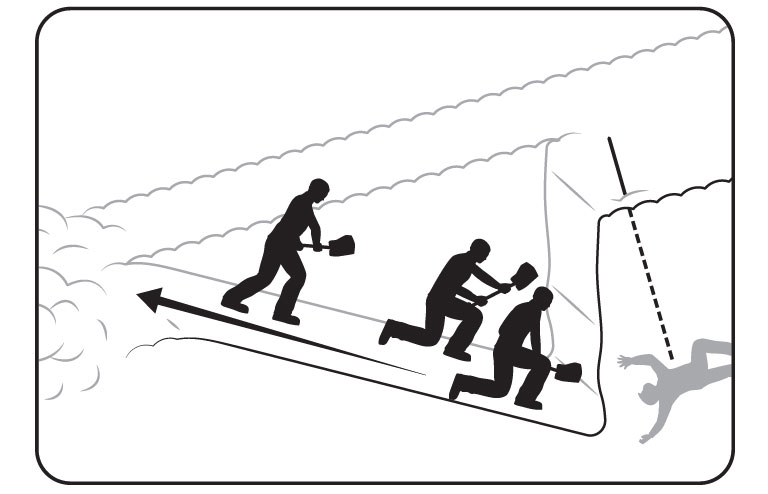
Clearing Snow: Ideally, you’ll clear snow downhill and to the sides by either chopping or paddling (depending on conditions) in order to create a platform 1-2 meters wide nearest your victim and 2 meters wide at the back like in the diagram below. This allows you to have space to provide first aid after excavating the victim. To achieve this platform efficiently, start by clearing snow to the sides. This keeps the downhill side from building up with a lot of snow — preserving it for snow removal later once the hole is deeper. Once the hole is deep enough that lifting snow up and over the sides is inefficient and tiring, paddle snow downhill and to the sides.

Single Rescuer
If you’re alone doing a rescue, that’s a huge bummer. This means you’re doing all the lifting (quite literally). Keep the ABCs in mind as you dig. Start downhill, and move snow downhill and to the sides as efficiently as possible. You’re still aiming to get the slightly angled platform above.
Conveyor Belt
With more rescuers, the more resources you have, but using those rescuers efficiently can be a challenge. A simple method to keep folks organized is the conveyor belt method. This works best with four or more rescuers. The video below demonstrates the method. Take note: partway through the video a fifth person shows up and violates the “A” of the ABCs by standing on top of the victim. Don’t do this.
Below is another video of the conveyor belt method. This time with 10 rescuers.
To Summarize…
Time is against you in an avalanche rescue, so efficiency is key. In order to get more efficient at strategic shoveling takes practice that can’t come from reading about it. So take an Avalanche Course. There you will learn how to best practice rescue on your own so you can build good habits. Hopefully you’ll never have to perform an actual avalanche rescue, but prepare for the worst. Below is one more video from BCA that does a pretty good job of reviewing most these concepts. Stay safe out there!
Want to learn more? Check out our Ultimate Guide to Backcountry Skiing.
